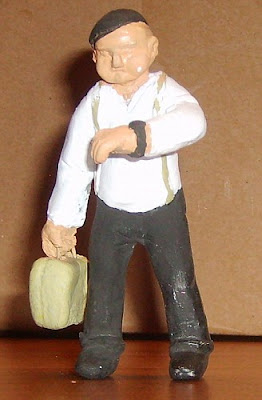
 I started sculpting my own figures years ago following the "Figure
Classes" by Chris Walas on the MyLargeScale (MLS) website. It's easier than you might
think and very fun to do!
 The classes are not hosted on MLS anymore, but luckily they can be found at a website about Chris Walas on 4largescale.com. This website includes a lot of other pictures and information about figures and his unique whimsical modeltrains.
Also Dwight Ennis from MLS has stored the articles as PDF's on his own North Pacific Coast Railroad website The articles and accessible by the links mentioned in his post on MLS. On request of Dwight I made a duplicate set of the articles to see to it that the articles outlive Dwight (and Chis) and are saved for younger generations to come.
So, here are the direct links to the articles in PDF format stored on this blog:
- Figure Class I
- Figure Class II
- Figure Class III
- Associated Files (Zip file with 3 additional PDF files)
Now let's get to work!
The method is very straight forward and fun to do. First start with an aluminum foil skeleton that is "designed" to withstand the temperatures of the baking; the aluminum will expand more than the clay but because the foil is crumpled the skeleton itself keeps it size while the expansion take place "in" the crumples. If you would make a skeleton out for instance pieces of brass wire the skeleton will expand, pushing the clay away/out of its form.
I made some figures that were totally build out of Fimo clay. But for smaller detail it's just a bit too hard/stiff to work with. Sculpy would be a better option and I was planning to try it out, but eventually I found out that Milliput is even better because it does not have to be baked at all.
The Milliput can be used over the Fimo clay, so I can make a "body" out of Fimo and do the detailing with Milliput!
 |
| Body from Fimo clay |
 |
| Head and deatils from Milliput |
 |
| Details from Milliput |
Painting
For this particular figure (Torrence) I used Tamiya acrylic paints for clothes, shoes, cap and suitcase (later figures were also painted with cheaper acrylic hobby paint from the local DIY shops, with very nice results).Also the base skin color was done with Tamiya paint. The shades in the face are done with the Andrea Flesh Paint set (waterbase/acrylic). The shades on the clothes and the eyes were done with thinned oil paint (Van Dijck's brown).
 |
| Basic layers |
 |
| Detailing |


No comments:
Post a Comment