Showing posts with label Weathering. Show all posts

Sunday, 10 November 2019

A car for the railway maintenance crew


This is an older project I did somewhere around 2012. It was described on the Continental Garden Trains forum which is unfortunately no longer active since several years now.


The base was a second hand but fairly unused LGB Toy-Train caboose. The car was bought cheap because two footplates were missing as you can see on the picture. The plan was to bash the caboose in to something looking more European car for the maintenance workers of the railway.


The bash would include at least two mayor steps: the roof had to be altered or replaced to give it a lesser American look and I wanted to get rid of the grips (at least, I think they meant to be grips) that were molded on the sides of the caboose.

A Dremel hand tool was used to sand the grips of. The trick was to gently and lightly, without too much pressure,  moving the sanding tool in the vertical direction, following the "wooden" siding strips. This way the 'scratches' of the sanding will be lesser noticeable and easier to remove than if you sand horizontally.
It is best to wear safety glasses and perhaps even a paper dust mask when doing this; the plastic dust and bits fly everywhere!


At the left the grip is still in place, at the right the grip is sanded of

 At the spots were the grips were molded, the grooves between the 'wooden' strips on the sidings are interrupted because of the molding.  With an old (but sharp) screwdriver, a hobby knife and a steel ruler this was fixed. Just carve the grooves over with the hobby knife followed by the screwdriver.


After all grooves were done I sanded the sidings again, now using a sanding sponge (some soft foam block with some sort of fine sanding paper on the sides, the type you can buy at the painting suplies at DIY stores). I've gone over the complete model until there was no more difference in surface between the sanded and non-sanded areas. 

Actually, I found this too smooth and neat. There were almost no 'wood grains' visible. I remembered a little tool that master garden railroader (at least in my eyes he is for sure) Ray Dunakin used to create wood grains for his buildings on his In-ko-pah Railroad. It was made from a hobby knife holder with a little saw blade in it. I used this tool and I liked the effect very much. 


When the surface was like I wanted it, I had to fill a few spots with bits of plastic (those spots where the roof supports fall in and where the caboose lanterns were mounted. I used very thin strips of polystyrene on top to cover the filled up openings.

The missing steps were replaced by a set that came from an old and incomplete LGB " Dynamite" car so that was solved quickly.

Next step was painting the body and chassis. I used Tamiya acrylic paint. If I remember correct I used Tamiya XF26 (deep green) as base with several slight grades of green and some weathering with thinned oil paint. A mixture of black and brown/rust for the chassis.


The roof was build out of polystyrene. A skeleton made from 4 supports, reinforced with strips and sheet. This skeleton fits nicely into the inside of the car.


Three thin sheets of polystyrene (almost as thin as thick paper) were used to build up the roof. Each sheet is glued on top of the other (laminate technique) using the extra thin Tamiya glue. 
The glue was applied with a bigger brush that the little brush that comes with the glue. The little brush don't work because the sheets are about 22,5 x 10,5 cm. and the first applied glue is dry when you get to the end of the sheet! 
Each sheet was slightly bigger to cover the one underneath completly. You can always sand or cut off to get the correct shape of the roofsides.


I used some left over pieces of grooved sheet to detail the underside the roof above the balconies.


The top layer of the roof was made out of fine waterproof sanding paper, glued with Pattex contact glue on the polystyrene. 
However, do not do this! Although this looked very sharp back than, now, after 7 years of use and storage in a garage the sanding paper has got all wrinkled and probably is also the cause of bending the roof slightly. So I will not use this anymore on newer projects! I will not advise anyone to use sanding paper for roof cover.


Thin strips of polystyrene glued on the sides for finishing (so you don't see the different layers of sheet).


The roof was than painted black, using Tamiya acrylics.

Notice the roof is still nice and straight...
Inside walls were made from polystyrene sheets and painted in a wood color. Windows were glassed using bits of transparent plastic from packaging materials. I started with some interior but this was not finished completely.  I will come back on this...


The following pictures are taken today (November 10th 2019) and you can see the roof is not as straight as it was in 2012.


Weathering of the sides

Weathering of balcony, footsteps and chassis etc.

-o-

Wednesday, 23 October 2019

Flatcar with Hanomag K55 tractor

The LGB ToyTrain range brings a bit toy-like carriages and cars that are often produced in very bright colors. Although the toy-like look of these cars they are basically well detailed and can be converted to more realistic cars easily. They are often offered on online auction sites for a friendly price and that makes them very suitable for modelling projects. I did some myself.

One of the easiest conversion I did was this ToyTrain flat car.


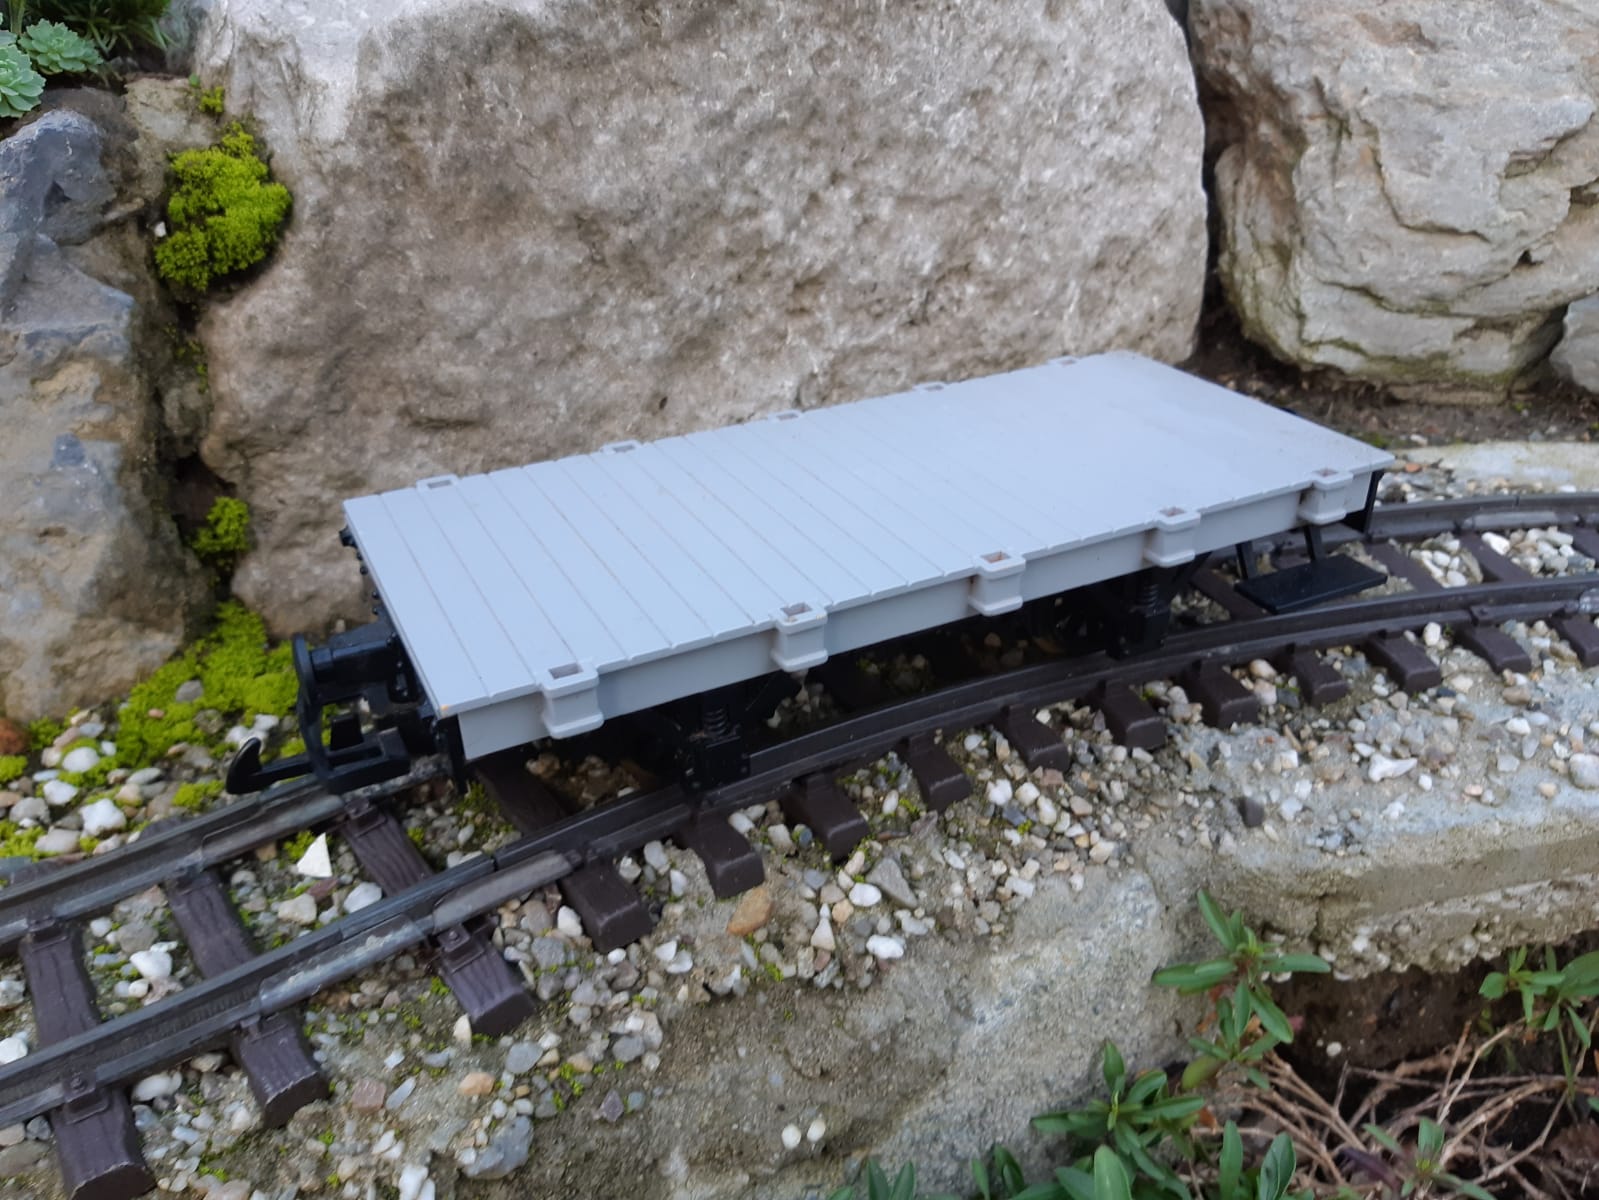
The donor car is a bright yellow LGB ToyTrain flat car (I think it is from the Lake George and Boulder starter set).


The chassis and flatbed where detached from each other. This can easily be done as they are connected with a few screws at the underside. Than the flatbed was sprayed in a gray color using a rattle can with grey primer paint. Actually I found this shade of gray just perfect so I left it this way, but you can of course spray (or paint) whatever color you like over the primer. My advise is to always use a sprayed primer first before applying an other color as this will give much better results.


The chassis was given a brownish/rusty black layer and a dry brush as I wanted a bit of a weathered look for the car.


Then both parts attached together again.


The flatbed was weathered using artist oil paint (those little tubes from a hobby shop). I thinned the oil paint with white spirits and applied it with a brush. I just led it flow over the model and the paint find its own way. This give shade effects and the grain of the plastic wooden planks shows up. The two beams molded on top where given a brownish/wood color so they stand out more and look like they are placed on top of the flatbed temporary.


The crates are made from balsa strips glued on a Styrofoam block (left over pieces from package material cut in shape). The Hanomag K55 tractor is a 1:25 Wiking model which is slightly weathered (yes it is missing the steering wheel on the pictures...).


And without the crates it looks like this.


Finally I have put on some chains and ropes that holds the tractor and crates in place but I do not know if this is very prototypical or not as it seems to me the tractor would be a heavy load that will holds itself in place fair enough. Trains stay pretty level so sliding of will not occur easily. But anyway it looks OK so I keep it this way ;-)


Here is another one, same process but not weathered:


-o-

Wednesday, 20 March 2019

Closed Freightcar

This freight car, or "wagon fourgonnette" as the French would say, was build using two LGB ToyTrain freight cars. Combining those two together would make an unique car with a mid-European / French appearance.

So... bring out the hacksaw and the glue!


This is how both cars looked when they entered the railway workshop. The yellow car is originally from the LGB 70994 Vedes Starter Set and the red one is original from the LGB - ToyTrain 90782 Auto Expres Start Set. Both cars were bought secondhand at an online auction site.


The Vedes logo is easily removed with a small screwdriver.
The chassis from both cars were cut using a small hacksaw. The LGB plastic is rather soft and easy to saw. The cut was made just behind the hole for the axles holders on platform side. See picture below.


The two bigger halfs of the chassis were glued together and reinforced with styrene strips. This formed the new chassis for the car. Both yellow and red car were cut in half at the desired length, so that together they fit on the new chassis.


Instead of one bigger sliding door on each side the car got two smaller sliding doors on each side. Therefor the doors needed to be a bit smaller than the original doors. The middle part, 3 planks wide, of each door was cut away with a fine hacksaw. 

Cutting away the mid 3 planks
Left; original door. Right: smaller door

Also the roof had to be longer. To made sure the pins in the sides fitted the slots in the roofs correctly I cut one roof somewhere 1/3 and the other 2/3 of the length. This way the roof fits easy in its original slots. I camouflaged the seem between the two parts by adding slats over the roof (visible on the pictures of the painted car a little bit more below).


And this is how it looked like after a few hours on a Saturday afternoon. The basic form is now finished. Next step is working away the seams, do some detailing and some painting.


You notice the doors are in wrongly?
Painting

The car was painted in a neutral grey livery with the frame 'metal bars' of the car painted black, which is very common for French narrow gauge freight cars. All original LGB handrails were placed back. Actually the car is not completely finished, it will still need some lettering. But I wait for that until I have found a nice name for the railway and figure out a sort of numeral system for the rolling stock.


And some weathering with artist oil paints.


The car runs reasonable but I noticed on the old railway that the LGB couplers somehow seem to cause derailments on more uneven track. This problem will not occur on the new railway because the track is more even laid. However I am considering to replace the LGB couplers for a little 3 link chain and hook as coupler.


 - o -