Showing posts with label Decals. Show all posts

Monday, 11 March 2019

Margnat tankcar part I


The Margnat tankcar on the former railway

In 2010 I started with the conversion of a LGB/ToyTrain tankcar (LGB 9040) into a French (looking) narrow gauge "wagon citerne". 
In this post I will describe how I painted the car and made decals for the Margnat signs. In a second post I will describe how I made the brakeman's cabin  and the platform.

The donor car was the LGB #94040 "Lehmann Benzin".
Notice that the rivets on top of the tank are interrupted. I made some replacements using drips of water resistant white glue. 


Missing rivets
New rivets

The molding seam were sanded away on top of the tank and on one of the topsides. The other topside can be removed like a lid and was molded in another way so it did not have a visible seam.


Painting

The color scheme is inspired by the H0 "Margnat" tank cars from Jouef, with blue as the main color and a logo in white with red lettering.  I made a simple drawing in Paint to see how the tankcar would look like with our without brakeman's cabin and with small or bigger logo. This gave a impression on how the car will become.  The lower left option was eventually the winner.


First I sprayed the whole tank gloss white (rattle can from DIY store) as gloss paint is easier to apply decals on than satin or matt paint. When dry I taped off the rectangle where the logo will come.

Sprayed white and tape in place
 
Next I sprayed the rest of the tank in Tamiya "French Blue" as it came close to the color of the Jouef tankers and the name sounded just right ;-)

Unfortunately the paint reacted somehow to the white gloss paint but only on a specific place; the edge of the side that can be opened. I don't know what caused the paint to react like this on this specific spot but the damaged paint looked terrible.


After the paint wa dry I carefully sanded the damaged spots, applied some filler and sanded again with fine Tamiya sanding papers. Than sprayed again.


This did not restore it as much as I first hoped for. Than some fellow modellers pointed out that it looked very much as rust spots painted over. It was not too bad, some weathering would even make it look realistic...


The white rectangle looked very sharp and nice. The blue paint did bleed a bit through the tape but this could easily be fixed wit some white gloss paint applied with a small brush.


Decals

The Margnat logo was also made in Paint, using a picture I found of and old emaille Margnat commercial sign. These looked a bit more interesting than the simple logo on the Jouef cars but are still close to the original.The method I used was probably not the most effective, certainly not with modern day techniques;  I converted the picture in Paint into a very simple 16 color BMP file (so actually the photo is simplified into a sort of drawing). Than I spend hours of filling pixels in the right colors....
 But all that work was pretty rewarding and this is how it looks afterwards:


Next I printed it a few times in different sizes to see how it looks like:


After chosen the right sizes (some big for the sides, a smaller for the topside) I printed the signs on a piece of Testors transparent decal paper. After printing I let it dry for 30 minutes and than I sprayed varnish over the decals to seal the not waterproof printer ink so it's not washed away when the decal gets in the water. Using varnish to seal the decals is much cheaper than to buy waterproof ink.
The decals were printed on a simple inkjet printer (Lexmark Z617 in 2010).


Top side logo

One of the top sides also has a Margnat logo. This side was actually a sort of lid that could be removed. This made it very easy to work with. First sprayed in gloss white, than the circle where the logo would come was covered with a cheap plastic cup in just the right size and sprayed in blue. Next step was to apply the decal as described above.

Plastic cup for masking

Logo in place


Putting the parts together

Underside was painted in matt colors


After putting the car back together it was weathered using mainly thinned oil paints (the artist type oil paints in tubes). Actually it looked already very nice as you can see on the pictures below. I could have stopped now but I decided to place a brakeman's cabin and a platform above the tank on it, so... on to part II.


- o -


Thursday, 14 February 2019

Dubonnet freightcar

The Dubonnet freightcar started its life as an altered LGB freightcar I bought second hand.


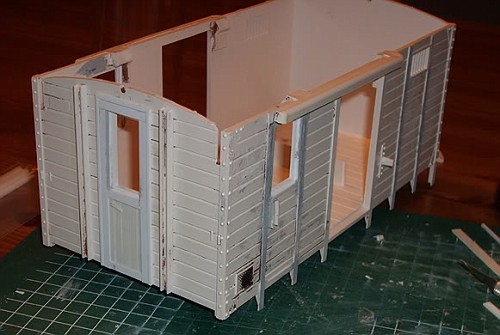
It was altered a bit by a former owner by placing a window in both sides. This gave it somewhat an appearance of a luggagecar and I liked the look of it.


From a distance the damages are not directly noticeable

From a distance it was not directly noticeable but the car had some mayor damages. There were multiple deep scratches on the surface as if the van was once attacked with a chisel or something. The heaviest damages were disguised with plastic sheets glued over. Some other scratches were filled up with putty causing a bit of a lumpy look.

Sheets covering damages

Scratches, filler and glue residues


I carefully removed the plastic sheets and the filler using a Dremel tool. It was possible to carve in new lines for the planking on the sides.


The brown paint was not original LGB but applied later on the model. The model was original white plastic. I decided to strip of all paint using MrMuscle ovencleaner in a plastic bag.

Stripping of paint

After cleaning the model the white plastic was giving away this was originally a LGB 4031 series freightcar. The white perfectly showed all the spots that need tender love and care. 


Using Tamiya putty I tried to recover all the damaged spots as neat and clean as I could. On some places I needed to carve in planking lines. This was not always as straight and clean as I desired but than again the planking on sidings of old heavy used freightcars seldom do.


 Also new frames for the windows and door at the head side were made from styrene strips


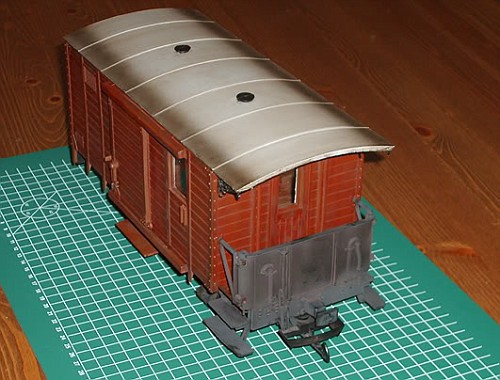
When all the work was done the car was sprayed light brown and weathered. The result was a very nice freight / luggage van.


But although it was nice looking I found it was missing something. It was a bit boring. So I painted all the 'iron' work on the car black, as is common in some European countries. I also wanted to add a "French" touch to it because this was build for my previous layout that had a French theme.
I came up with the idea to add a commercial sign / advertising on the sides with was a common thing on some secondary railways and tramways.

A suitable old French commercial Dubonnet sign was found and printed on decal paper from Testors.
These work just like the waterslide decals that you find in plastic kits. Because they are very thin it will look like as if the sign was painted on the surface.

There are 2 things that need attention when printing decals on an inkjet printer:

1. spray a varnish or clear coat over the decals after printing. This will protect the print against the water and prevent the colors to wash away.

2. bare in mind that 'white' is not a color that a printer prints. This means the transparent decal will stay transparent where it actually need to be white. Therefor I needed to paint the surface where the decal must be placed white. If I had not done this the letters "Dubonnet" would be as brown as the planking.

It is actually better always paint the surface white because all colors of the decal will come out much better than on a colored surface.

I needed 2 signs but I printed 4 so I had some reserve if I screw a decal up. However the decal paper works very fine and applying them was very easy, especially using setting solutions Micro Set and Micro Sol.
I also used white numbers and letters for some lettering, like the car number. These decals came from 1:35 scale Russian Army military kits. 


Testors decalpaper and Micro Set and Micro Sol
Painting surface white

The end result


Du bon, du beau, du bonnet


On the old layout


You can find this car also on the Garten Bahn Database


-o-